LokcalDev

A modern local development environment manager for macOS & Windows. The lightweight alternative to MAMP PRO and Laravel Herd.

Stars Build Downloads Release
LokcalDev - Modern local development environment manager for Mac Windows | Product Hunt

Everything You Need

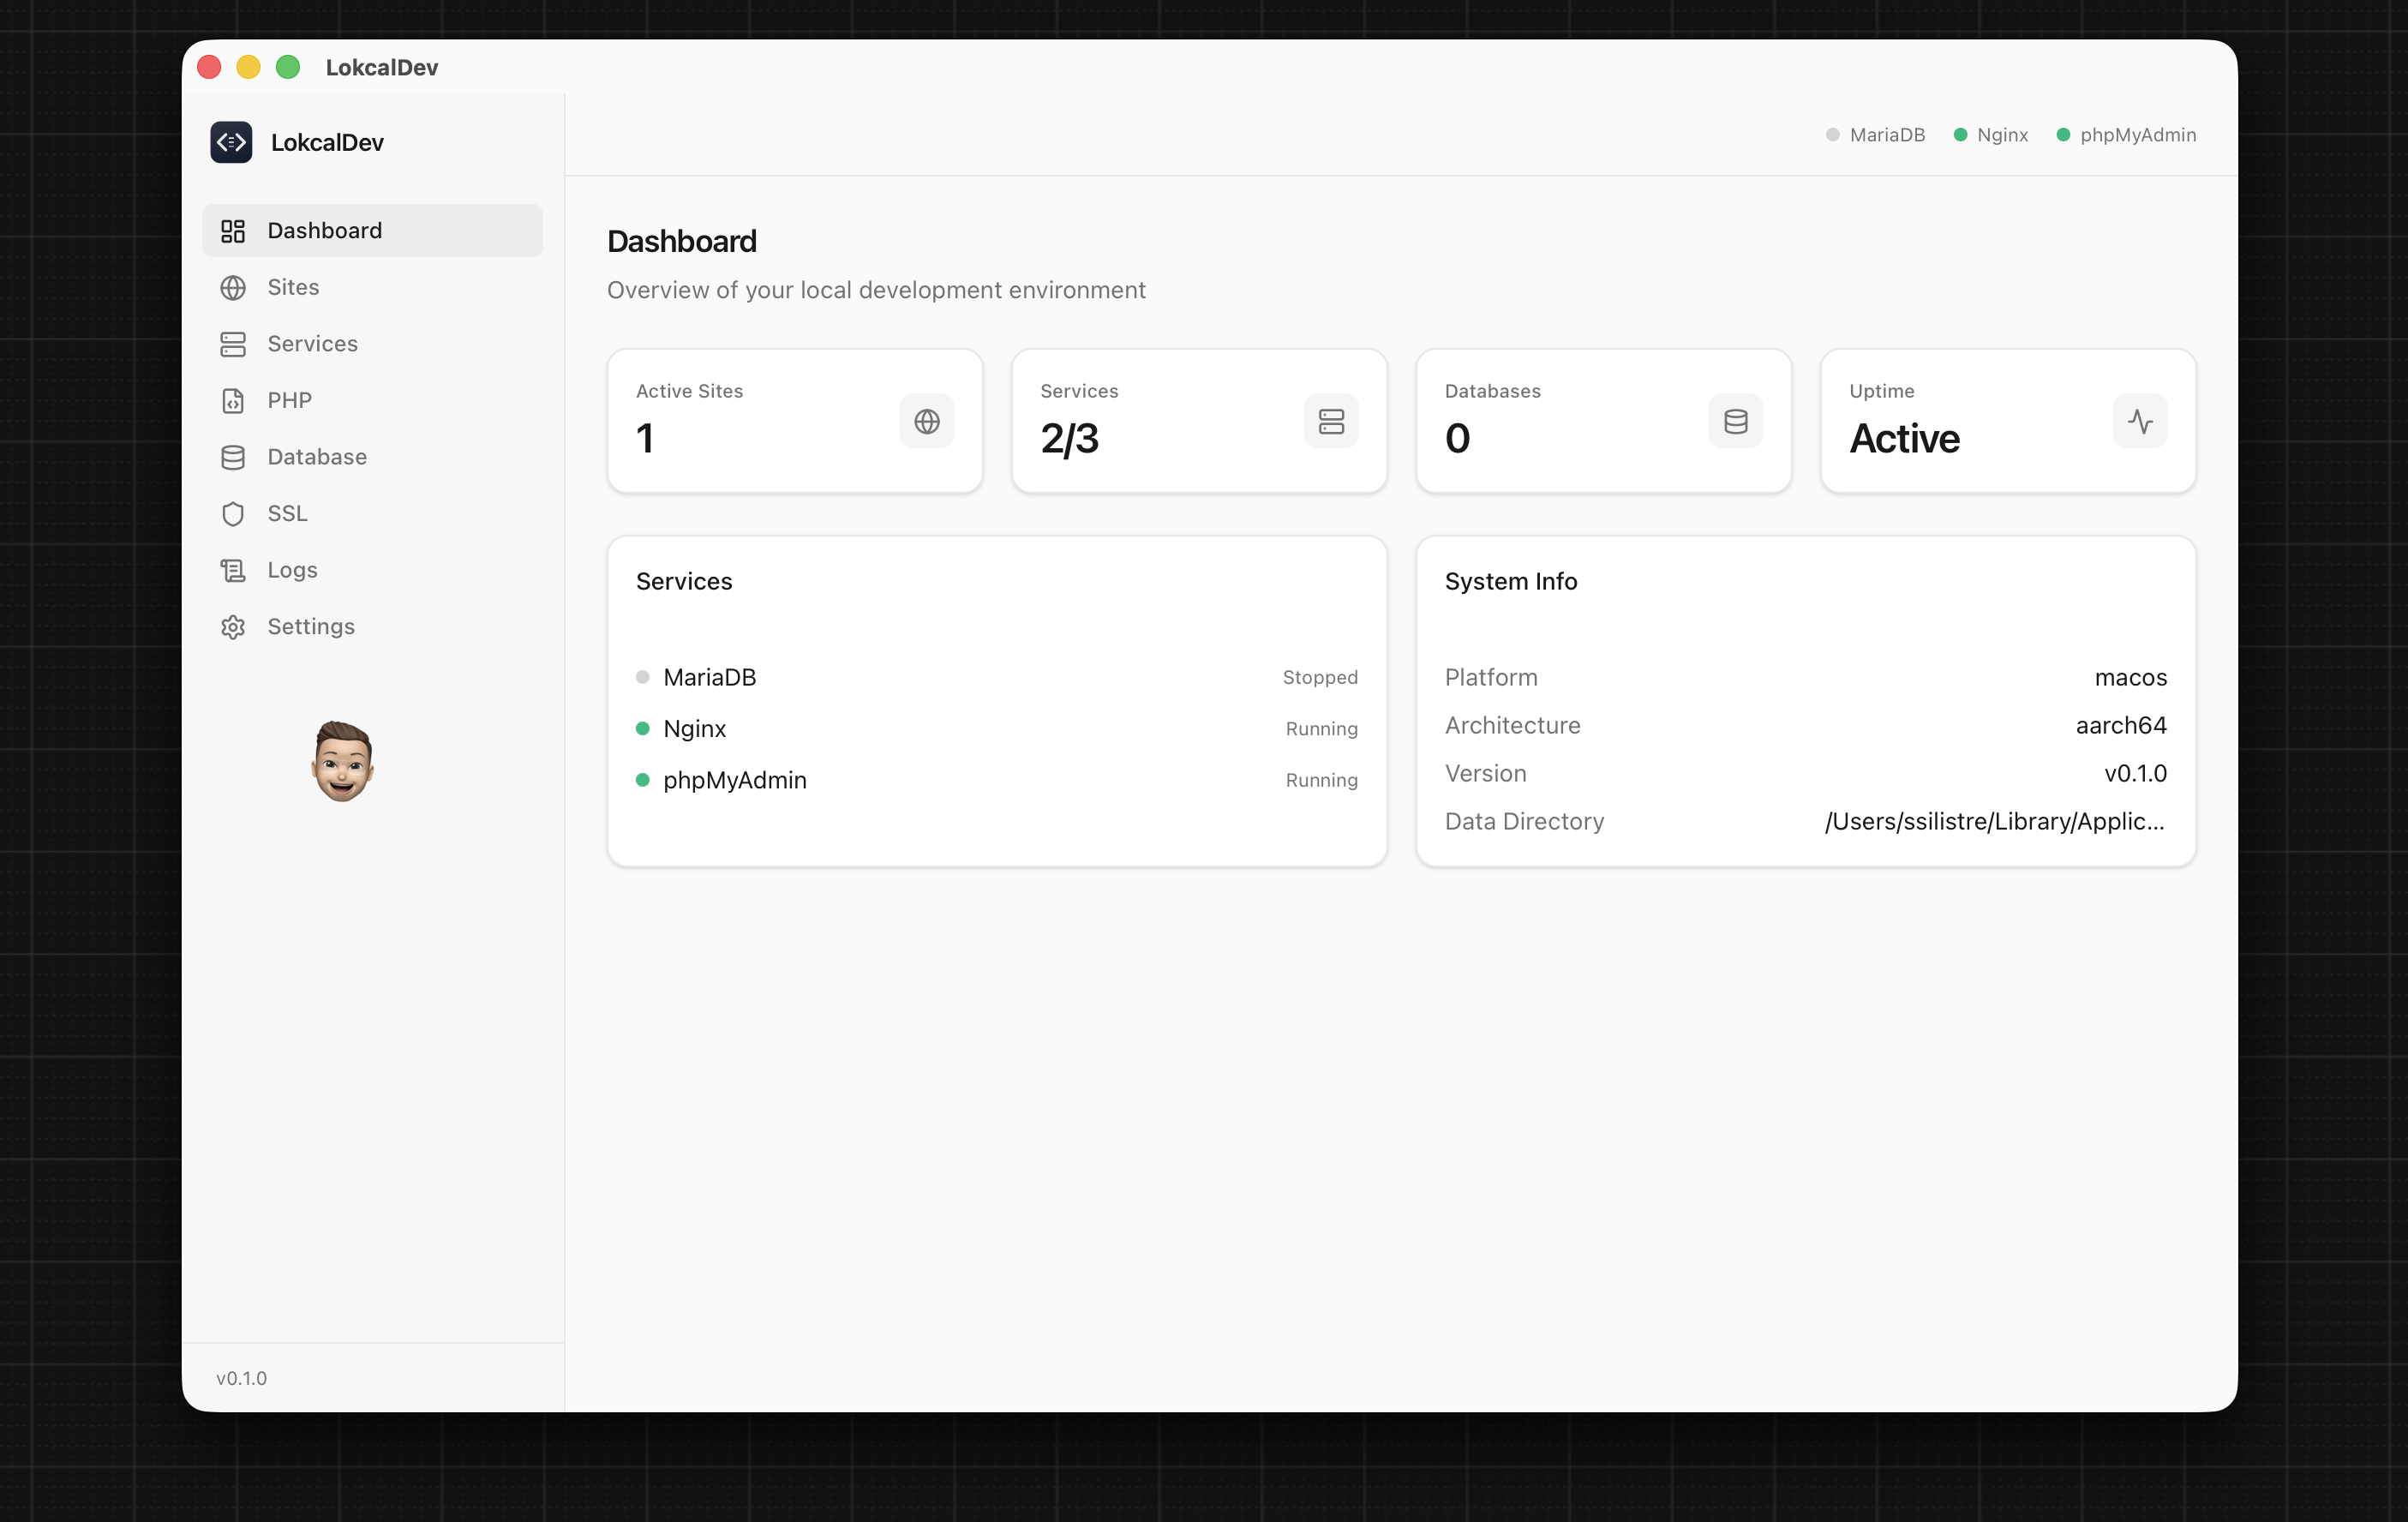
A complete local development stack managed from one clean interface. No terminal gymnastics required.

Multi-version PHP

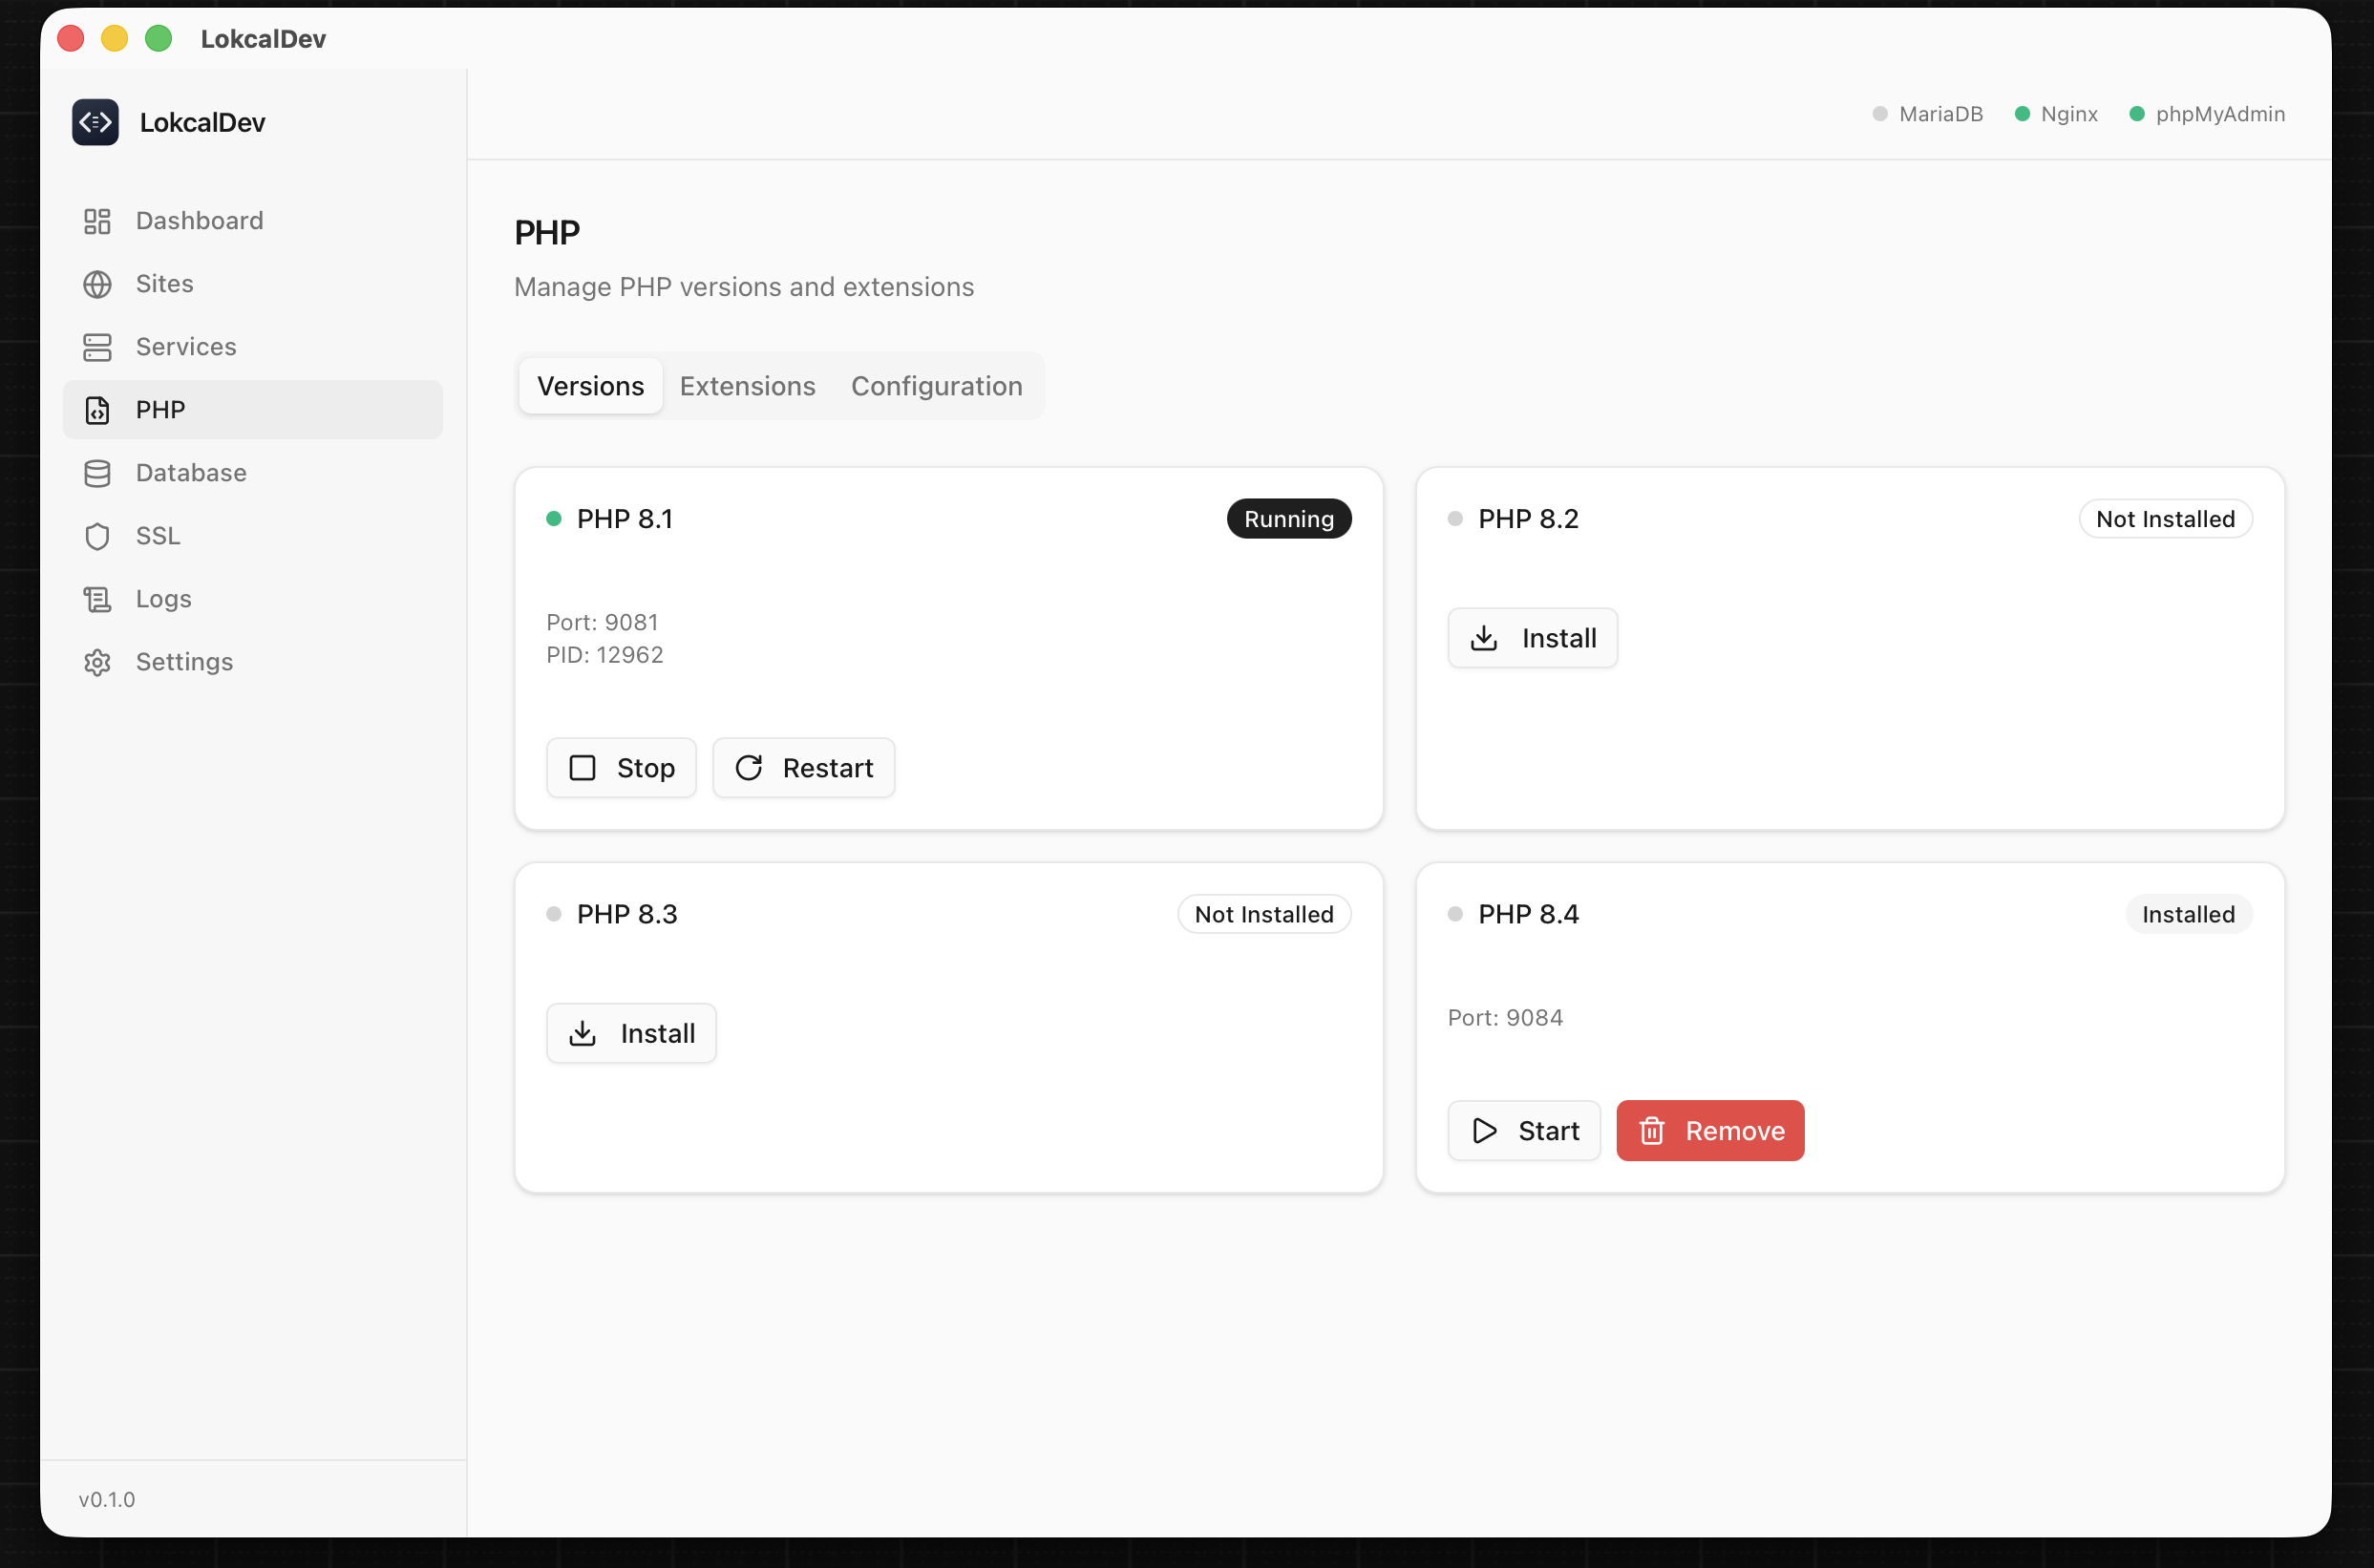
Install and run PHP 8.1 through 8.4 side-by-side. Switch versions per site. Manage extensions and php.ini from the UI.

Nginx Web Server

Auto-configured virtual hosts, SSL support, and phpMyAdmin integration. Zero-config Nginx setup out of the box.

MariaDB + phpMyAdmin

One-click database installation and management. Visual database administration with phpMyAdmin built right in.

Site Management & Templates

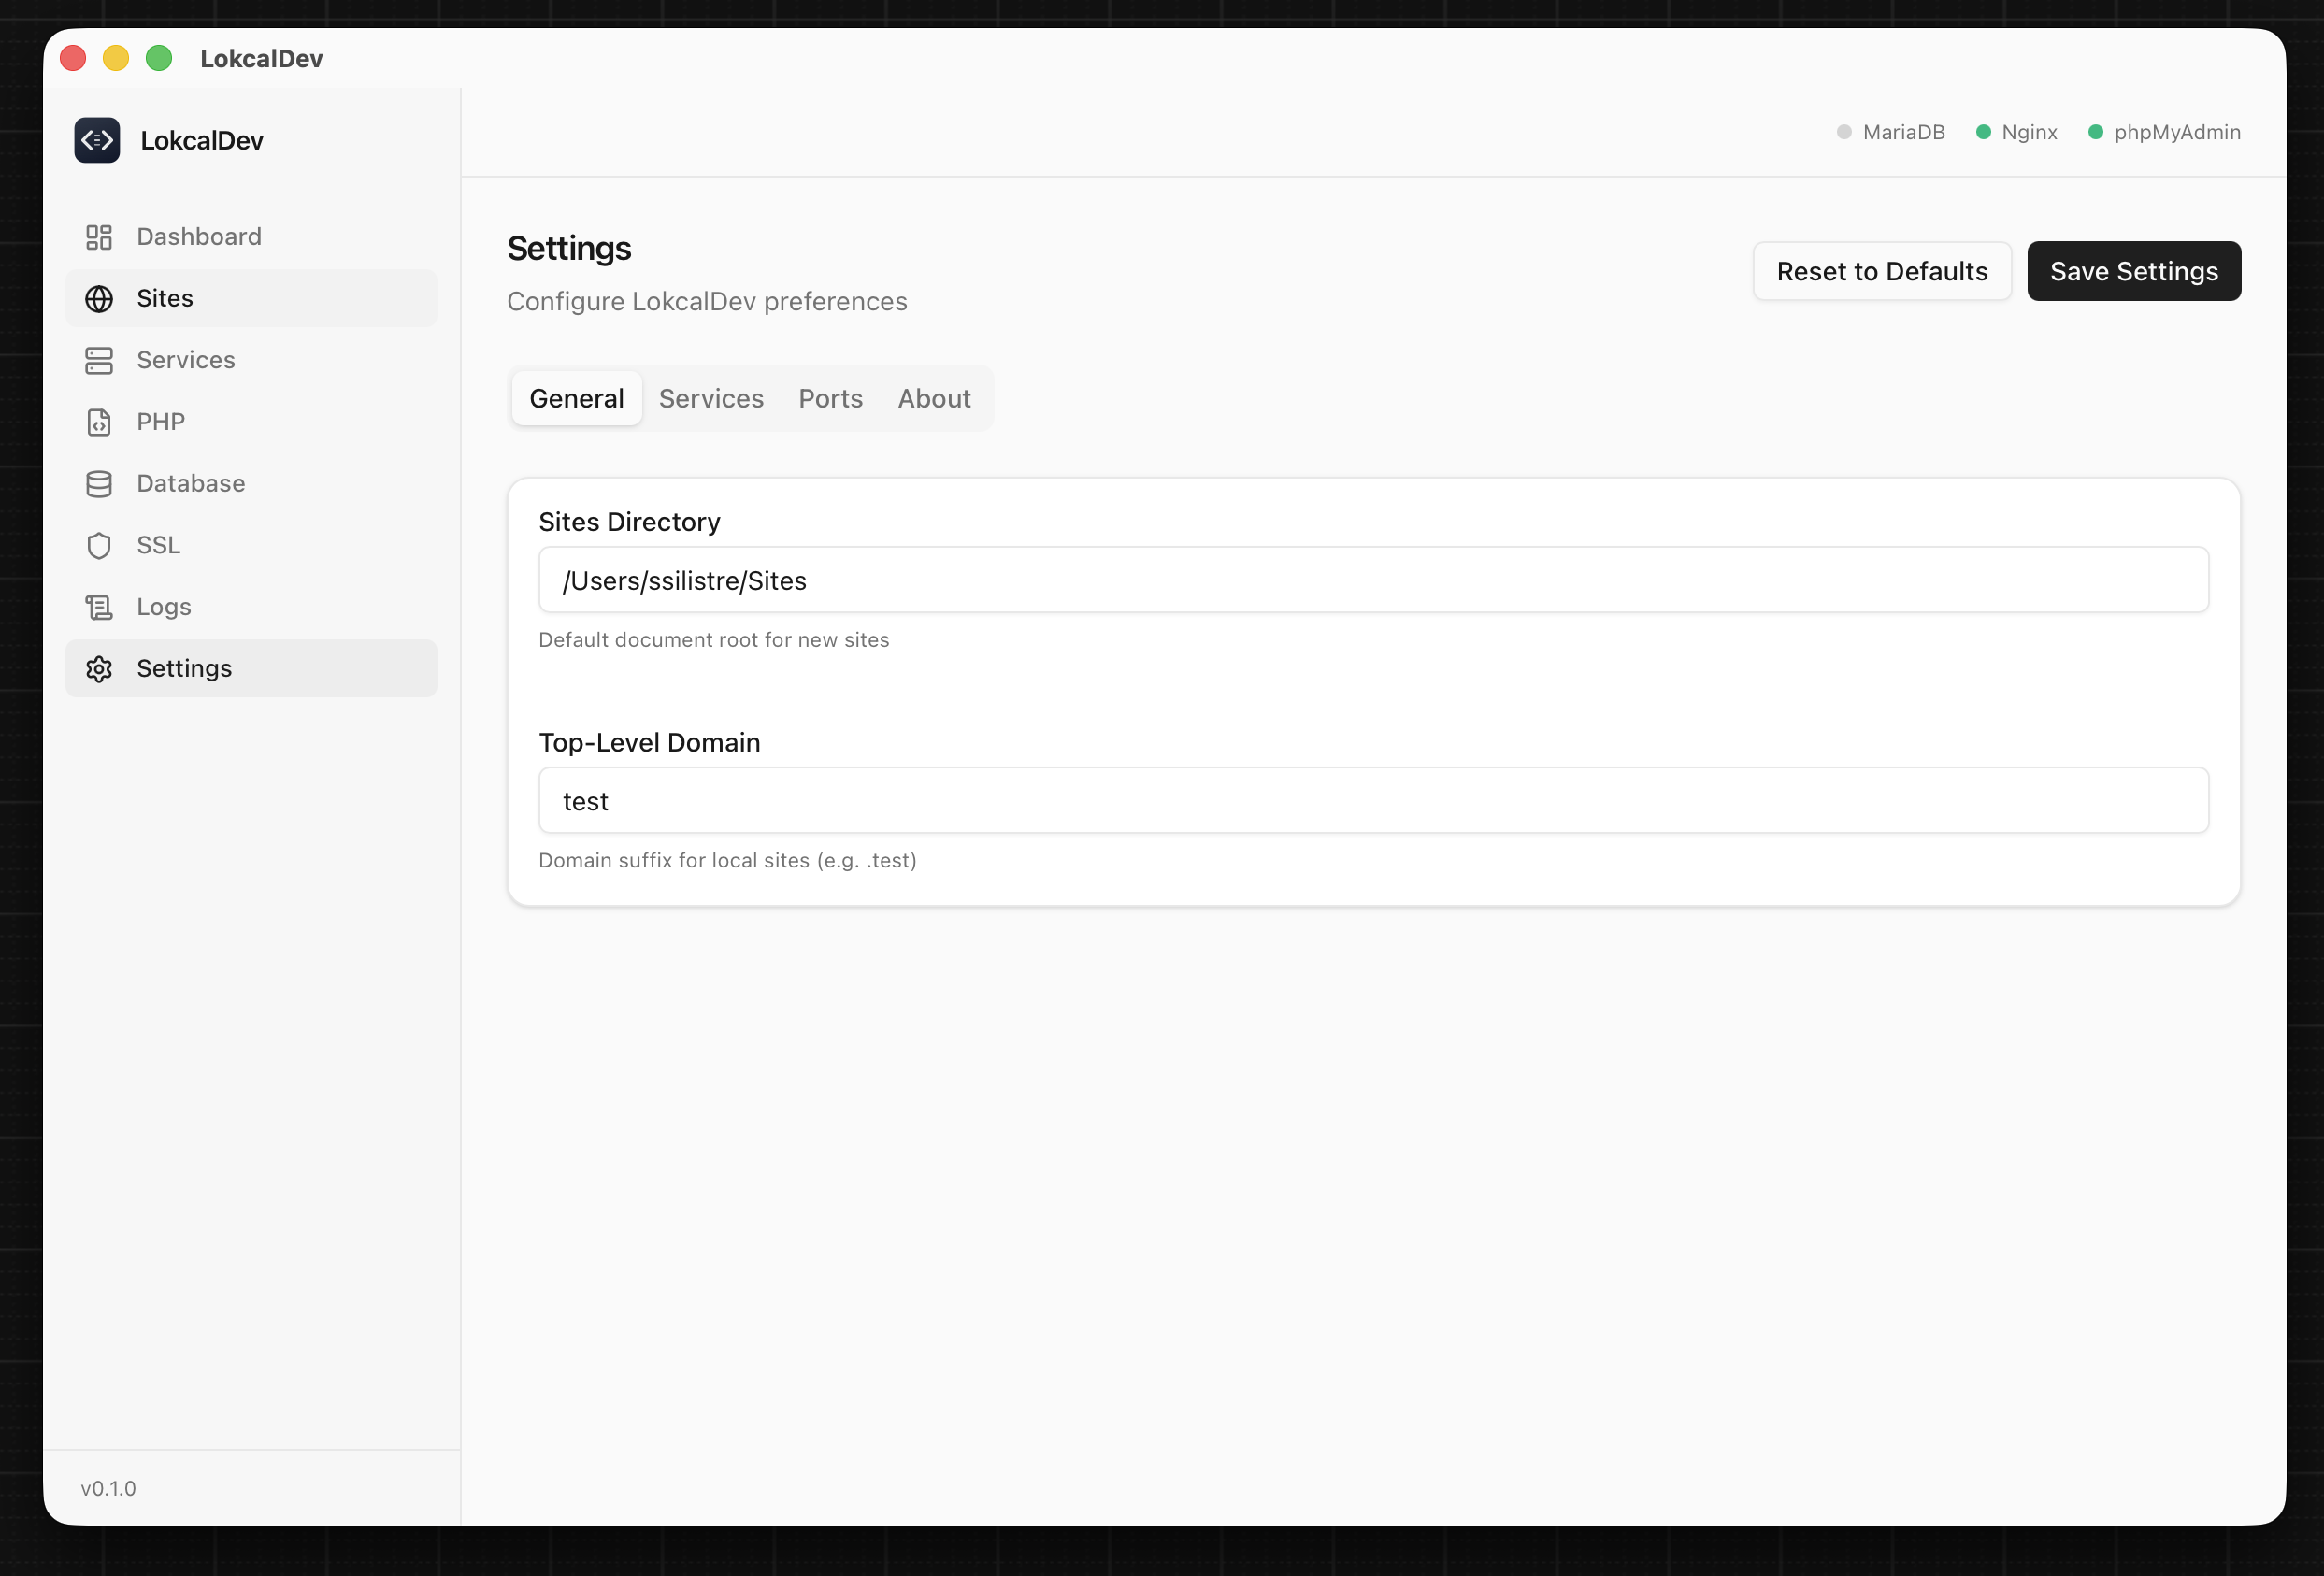
Create .test domains instantly. Each site gets its own config, PHP version, and optional SSL. Templates for WordPress, Laravel, and more.

SSL Certificates

Auto-generate trusted local SSL certificates via mkcert. HTTPS on your local sites just works with zero configuration.

DNS Management

Automatic DNS via dnsmasq (macOS) or hosts file (Windows). Your .test domains resolve instantly with zero configuration.

AI Assistant

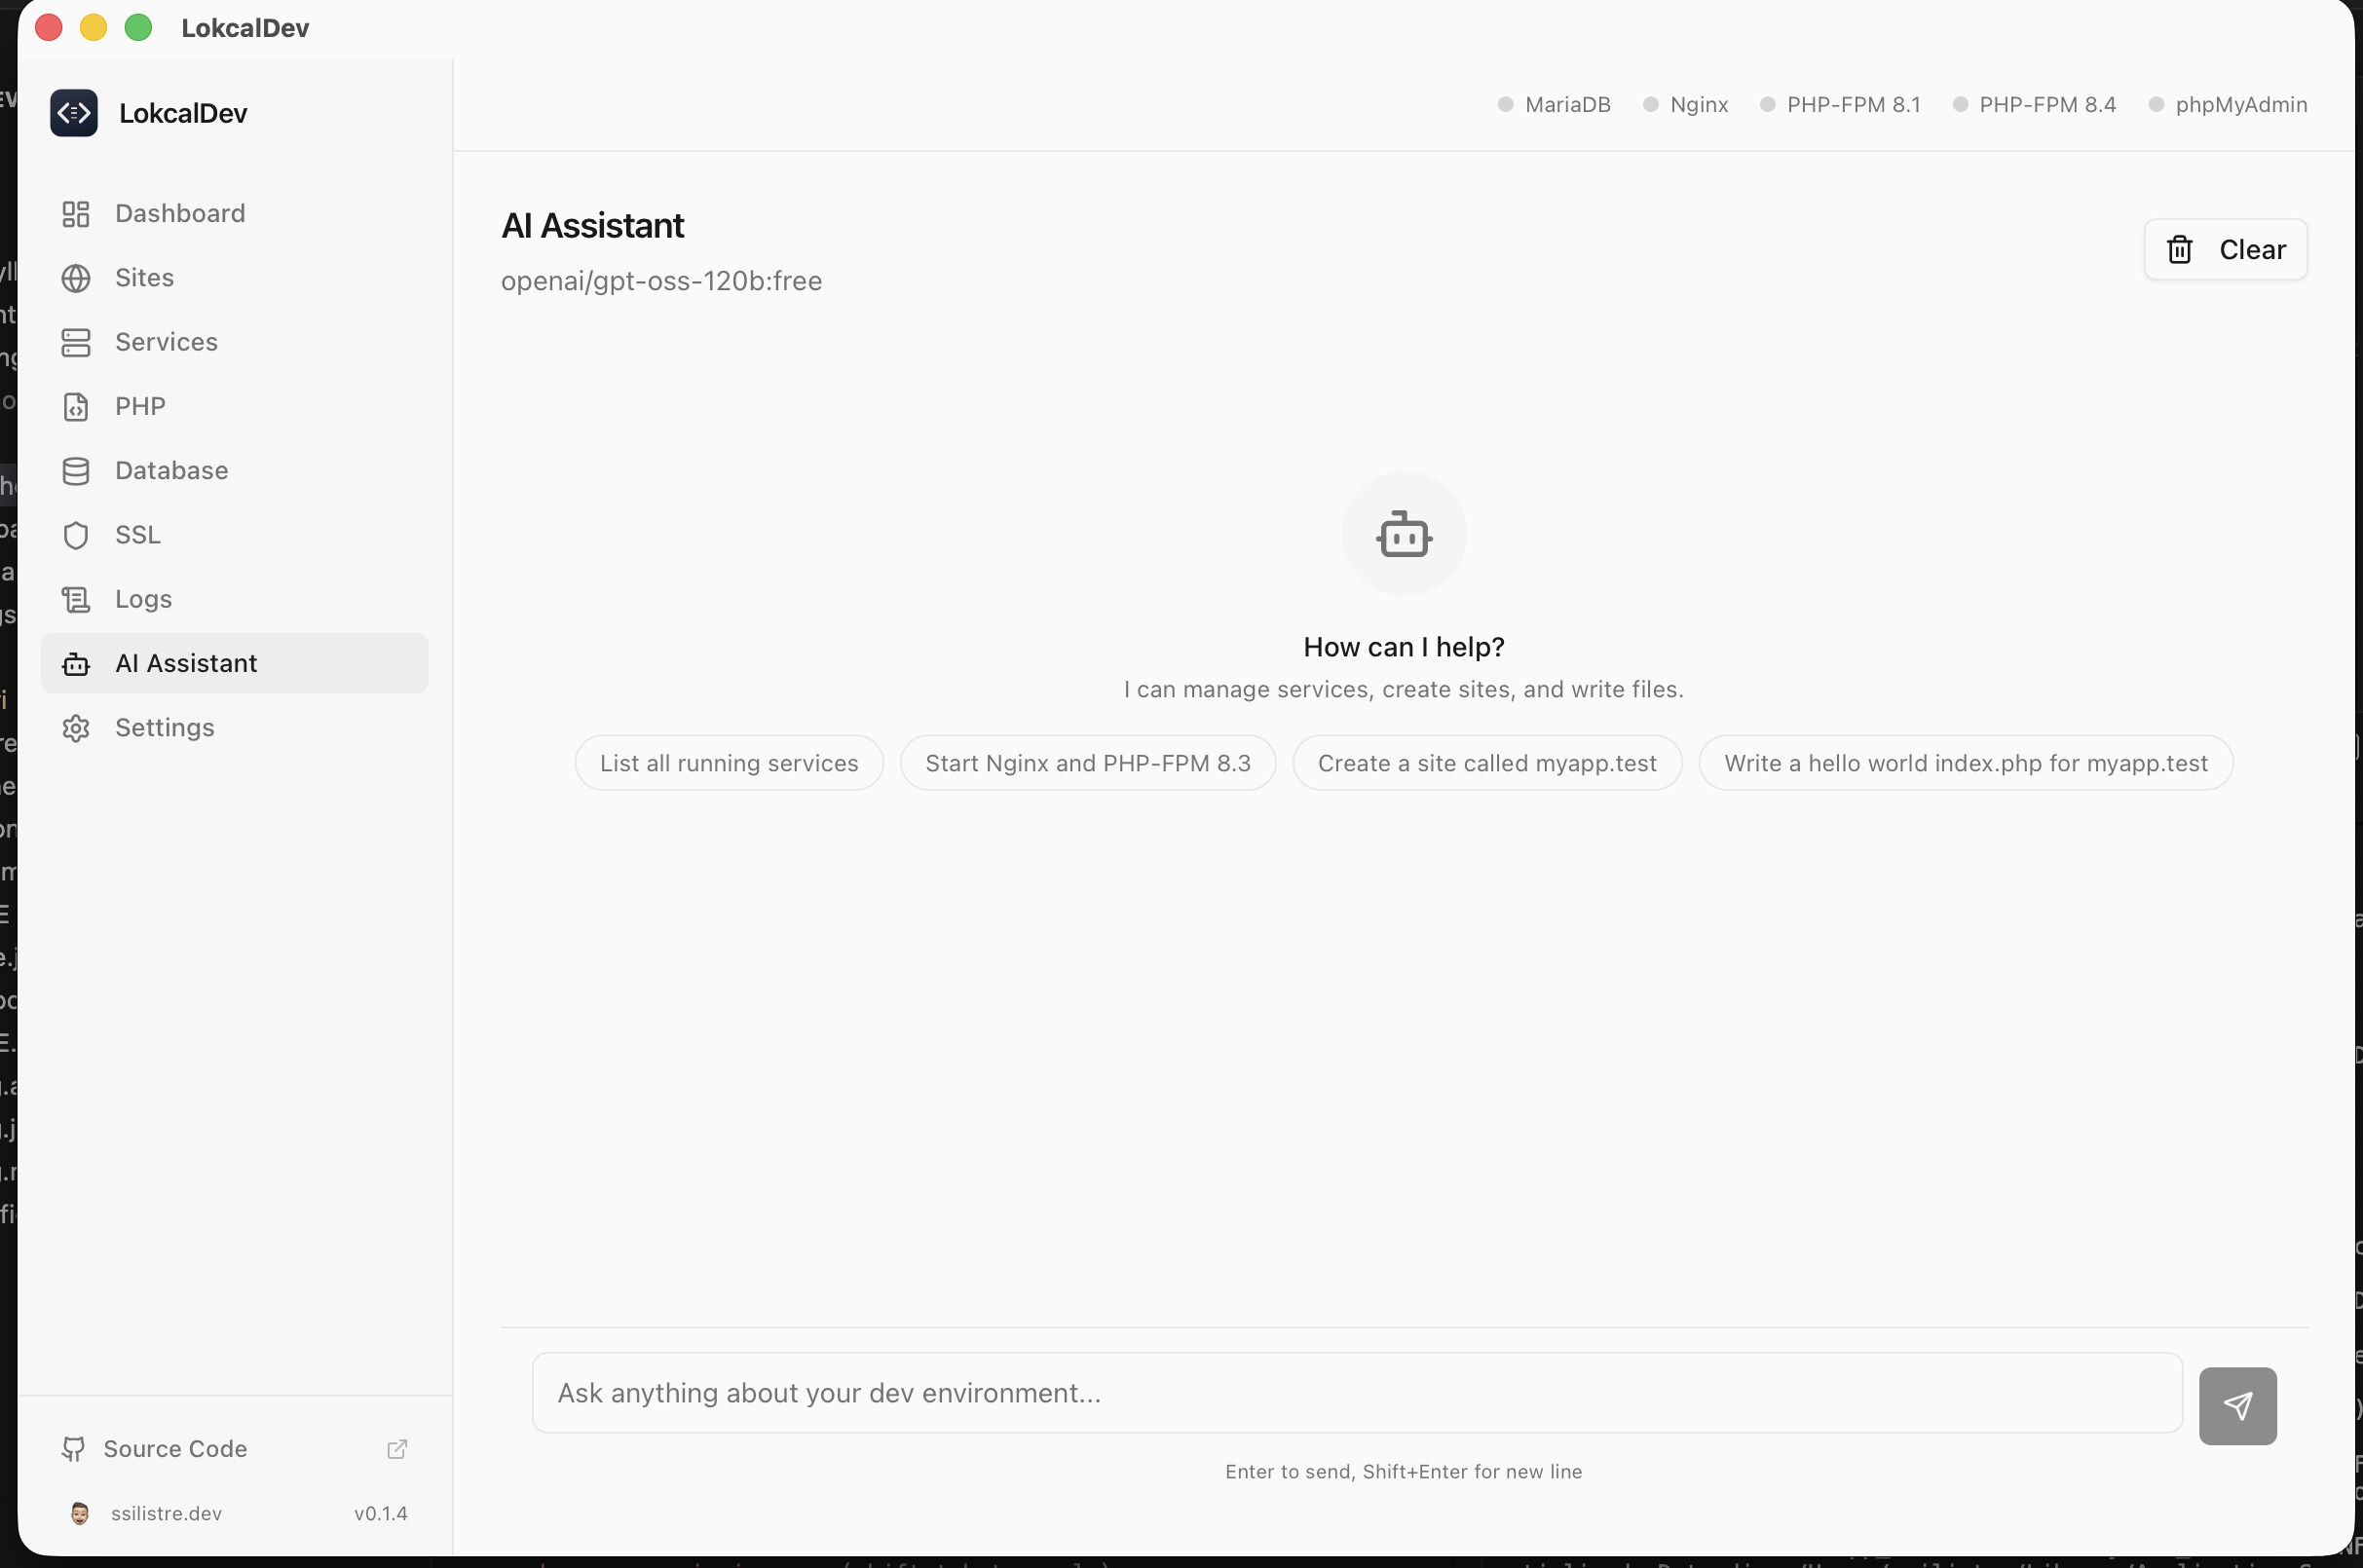
Built-in AI chat via OpenRouter. Start services, create sites, write files, and manage your environment through natural language.

No Password Prompts

Nginx runs on port 8080 and dnsmasq on port 5353 — no sudo needed for daily operations. Start and stop services freely.

Real-time Logs

Tail Nginx access/error logs and PHP-FPM logs live from the dashboard. Debug issues without touching the terminal.

Site Templates

Scaffold new projects instantly with built-in templates. Everything is configured and ready to code.

📄

Blank

A clean starting point with a simple index.php file.

  • Nginx virtual host
  • PHP-FPM config
  • Default index.php
🌐

WordPress

Full WordPress installation with database auto-provisioning.

  • Latest WordPress download
  • Auto database creation
  • wp-config.php setup
  • Correct permissions

Laravel

Laravel project via Composer with optimized Nginx config.

  • Composer create-project
  • Public dir Nginx config
  • Auto database creation
  • .env configuration

Fat-Free Framework

Lightweight F3 installation with rewrite-ready config.

  • Composer require f3
  • URL rewrite config
  • Bootstrap index.php
  • Public directory setup

Getting Started

From install to running your first site in minutes. Follow these steps to set up your environment.

1

Install LokcalDev

  1. Download the latest release for your platform from GitHub Releases.
  2. On macOS, open the .dmg and drag LokcalDev to Applications.
  3. On Windows, run the .exe installer.
  4. Launch LokcalDev from your Applications folder or Start menu.

macOS Gatekeeper note: If macOS says the app "is damaged and can't be opened", open Terminal and run:
xattr -cr /Applications/LokcalDev.app

2

Install PHP

  1. Navigate to the PHP page from the sidebar.
  2. Choose the PHP version you need (8.1, 8.2, 8.3, or 8.4).
  3. Click Install and wait for the download to complete.
  4. Once installed, PHP-FPM starts automatically. Manage extensions and php.ini settings from the same page.
3

Start Nginx

  1. Go to the Services page.
  2. Click Install next to Nginx if it is not already installed.
  3. Click Start to launch the Nginx web server.
  4. Nginx is now running and ready to serve your sites.
4

Set Up MariaDB

  1. Go to the Database page.
  2. Click Install to download MariaDB.
  3. Click Initialize to set up the data directory.
  4. Click Start to launch the database server.
  5. Create databases directly from the UI as needed.
5

Create Your First Site

  1. Navigate to the Sites page and click Add Site.
  2. Choose a template: Blank, WordPress, Laravel, or Fat-Free Framework.
  3. Set a domain name (e.g., myproject.test) and document root.
  4. Select the PHP version for this site.
  5. Click Create — the site is live and accessible in your browser.
6

Enable SSL

  1. Go to the SSL page.
  2. Install mkcert if prompted (one-time setup).
  3. Install the Certificate Authority to trust local certificates.
  4. Toggle SSL on for any site — a trusted HTTPS certificate is generated automatically.
7

Install phpMyAdmin

  1. On the Database page, click Install phpMyAdmin.
  2. Once installed, click Open phpMyAdmin to launch it in your browser.
  3. Log in with user root and no password (local development defaults).
  4. Manage your databases, tables, and queries visually.

Built With

Modern technologies for a fast, native experience under 15 MB.

Tauri 2.0
🦀 Rust
React 19
🔸 TypeScript
🎨 Tailwind CSS v4
shadcn/ui
🐻 Zustand

Screenshots

A clean, focused interface that stays out of your way.

Dashboard
Dashboard
PHP Management
PHP Management
AI Assistant
AI Assistant
Settings
Settings